Getting Started
- Setting up accounts
- Record opening balances
- Recording a transaction
- Split Transactions
- Dashboard
- Balance Sheet
- Income Statement
1. Setting up accounts
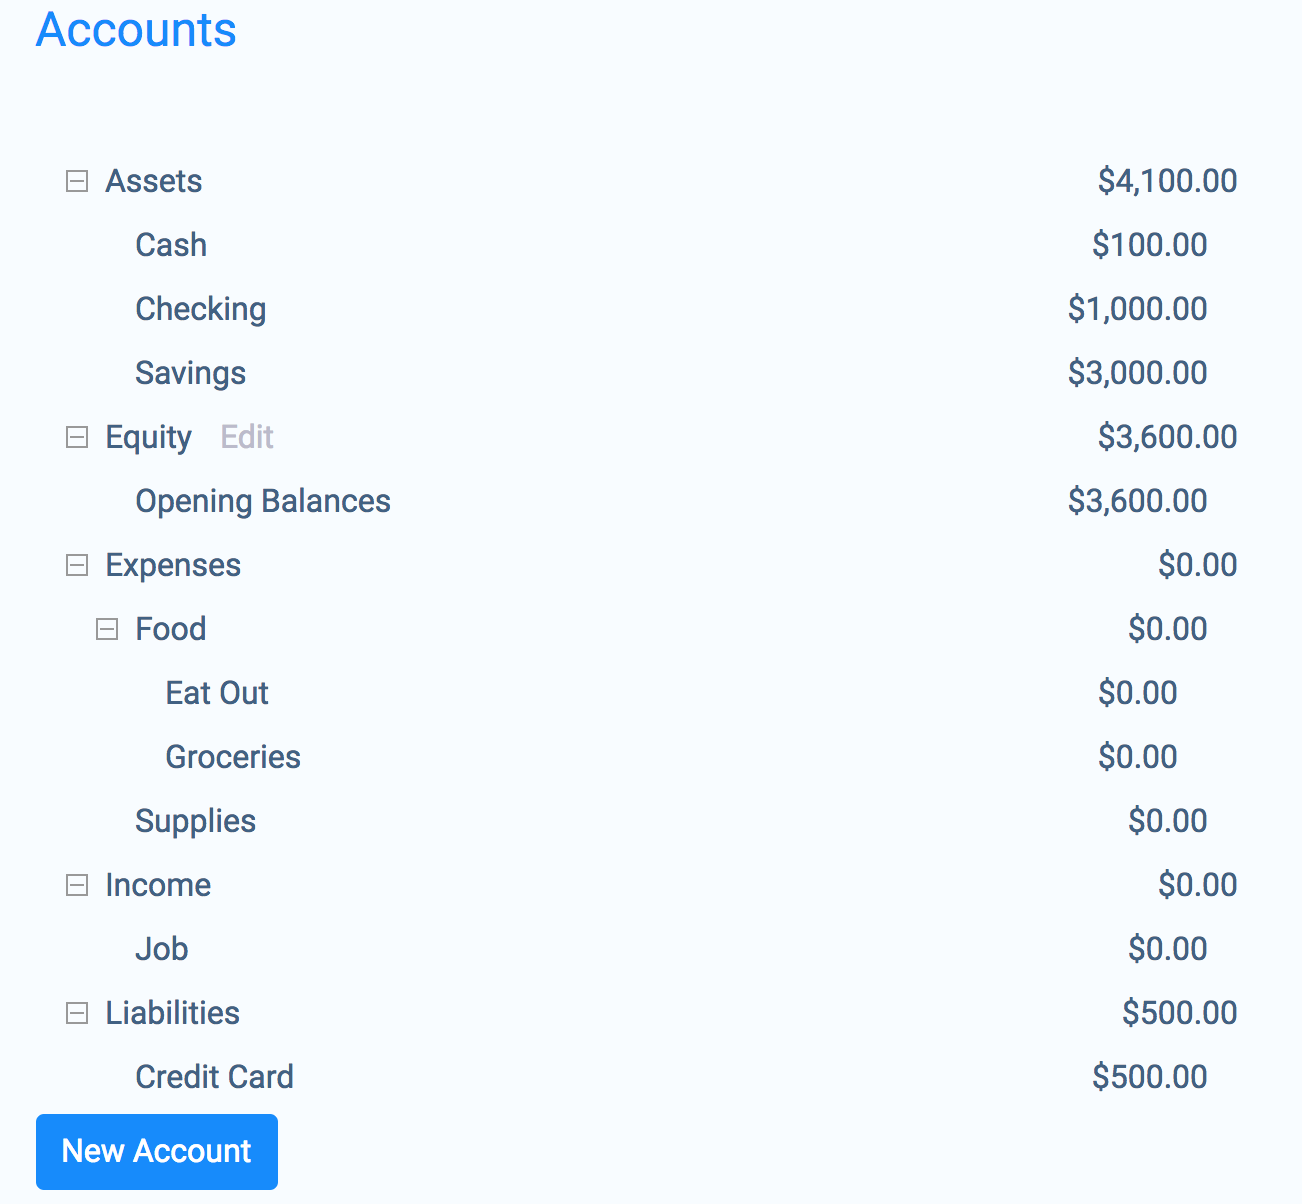
The first thing you want to do is set up accounts. Accounts are used to track your assets, liabilities, equity, income and expenses. If you selected the box for creating default accounts, you can customize the accounts to suit your needs. Otherwise, you can create them from scratch.
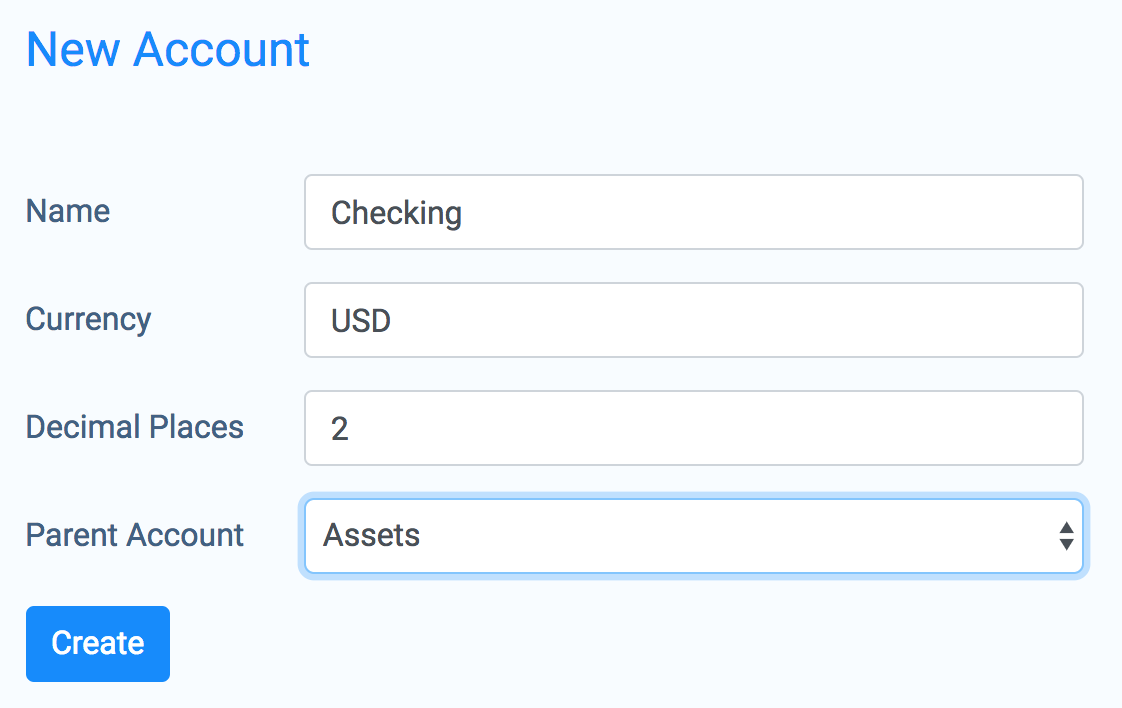
Click on the Accounts link in the menu. You will want to make an account for each asset that you want tracked. Examples of assets are cash, bank accounts, vehicles, real-estate and stocks.
Click New Account, and enter the asset's name, currency, decimal places and parent account:
Create accounts for liabilities. These include credit cards, mortgages, car loans, other loans and taxes owed.
Create accounts for expenses. You will want to come up with categories for all of your common expenses. For other unanticipated expenses, you can either create new categories as you need them or you can create a catch all Miscellaneous or Other account.
Create accounts for income. If you are a business this will be all the different types of revenue you bring in. If you are an individual this will be your job and any other sources of income.
Create accounts for equity. If you are a business, these accounts will depend on what business structure you are, ie: an LLC or corporation. If you are an individual, you will want to have an Opening Balances account that will serve as your initial net worth at the beginning of the year. As you go throughout the year, your net worth will increase as you bring in income, and decrease as you make expenditures.
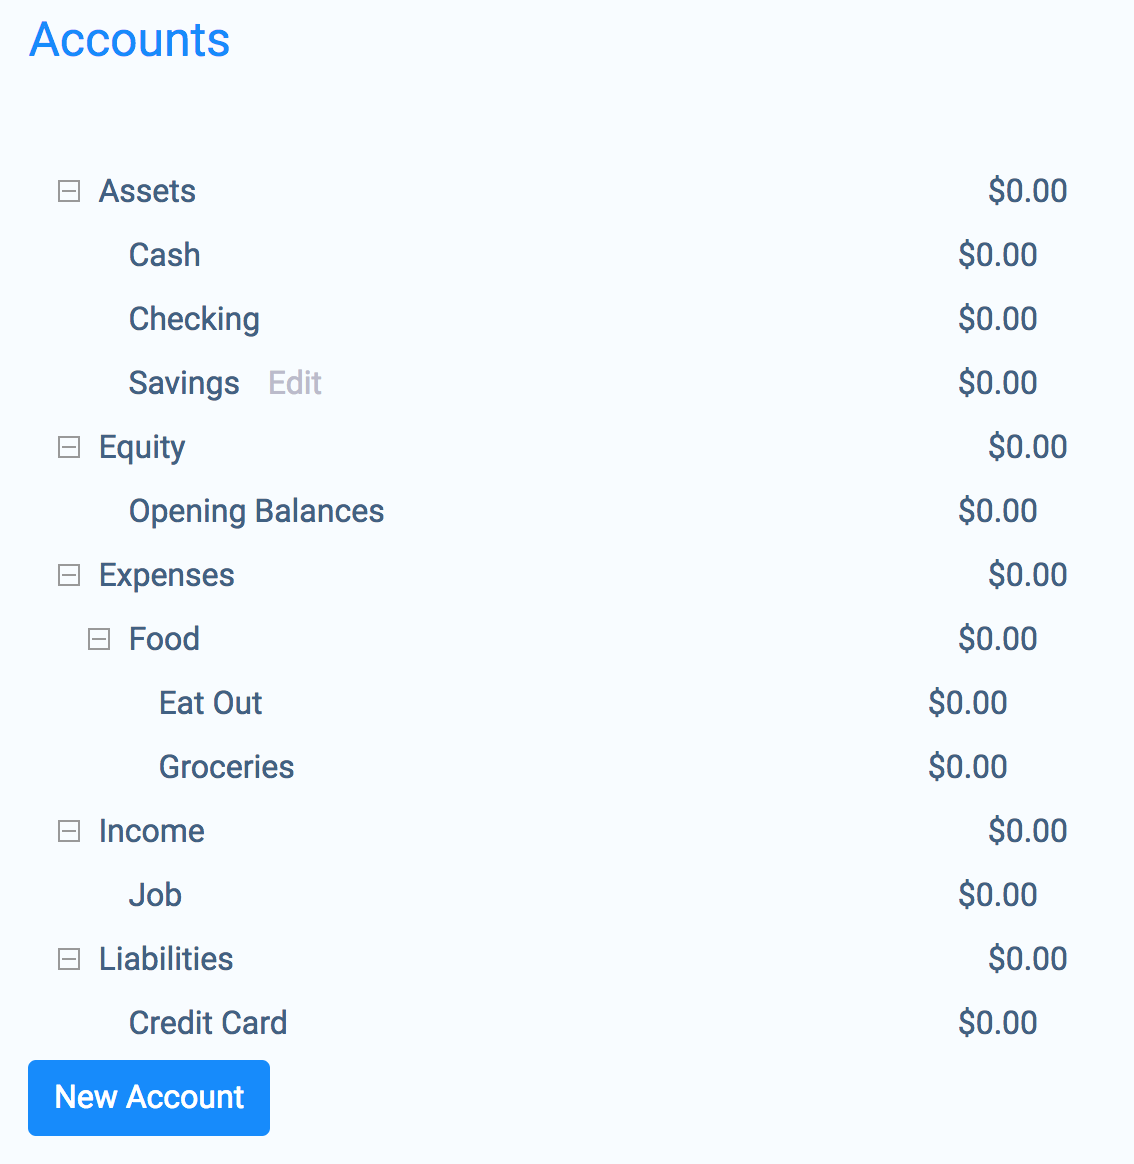
When you are done you will have something that looks like this:
2. Record opening balances
Next you will want to record the opening balances for each asset and liability at the beginning of your accounting period. Usually the beginning of your accounting period will be January 1st, but if you are starting mid-year you could pick the 1st of the month you are currently in or the current date.
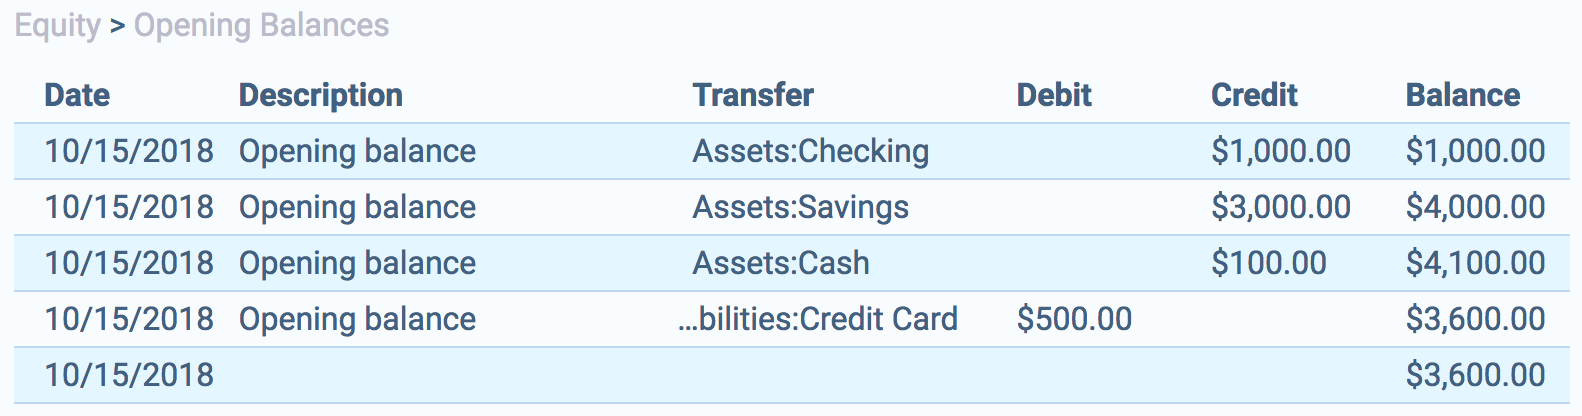
Click on your Opening Balances account under equity. This will bring up the transaction editor. With double entry accounting, every transaction you create will have at least two sides to them. With opening balance transactions, one side will be Equity:Opening Balances and the other side will be the asset or liability you are recording an opening balance for.
Set the date to the beginning of your accounting period. Call the description Opening Balance. For the transfer account, choose the asset or liability you are recording the opening balance for.
If your equity (net worth) is going up with this transaction, ie: you are transfering to an asset, enter the amount in the Credit column. If your equity is going down with this transaction, ie: you are transfering to a liability, enter the amount in the debit Debit column.
For more information on understanding debits and credits, here is a WikiHow tutorial explaining them.
When you are done, your Opening Balances account will look something like this:
Now when you go back to the Accounts screen, you will see that your Assets = Liabilities + Equity (+ Income - Expenses). This equation will always remain in balance.
3. Recording a transaction
Now we will go through the steps to record a transaction.
Imagine we go out to eat. We pay with our debit card which is linked to our checking account.
We can record the transaction by either going to the Checking account or the Eat Out account. Let's record it by going to the Checking account.
Put in the date and description. For the transfer account, choose Expenses:Food:Eat Out. Because our asset is going down, we are going to credit the asset. Put the amount of the expenses in the credit column.
Your transaction will look something like this:

4. Split Transactions
Now let's do a little more complicated transaction. Say you go to the store and you buy both groceries and supplies. You can record this using the Split action.
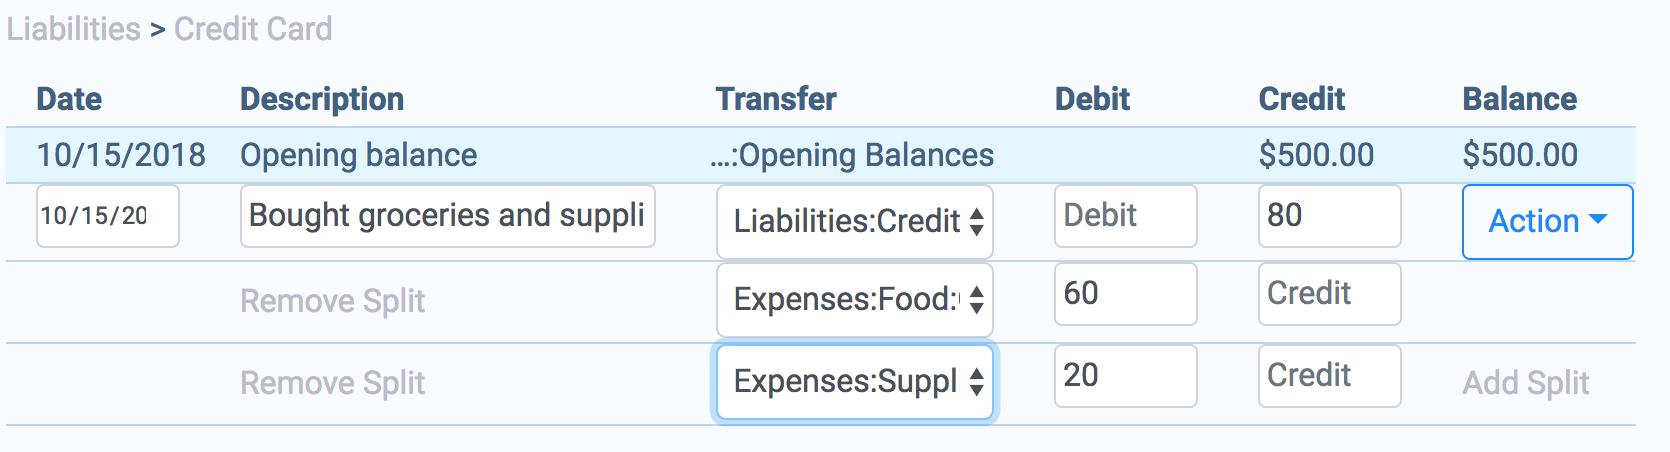
We are going to pay for this transaction with our credit card, so click on the Credit Card account under Liabilities.
Enter the date and description. Because our liability is going up, we credit the liability. Put the total amount in the credit column.
Click Action -> Split. Choose Food:Groceries for the transfer account on the second row. Put the amount of the groceries in as a debit.
Click Add Split to get another row. Choose Supplies for the transfer account. Put the remaining amount in the debit.
It should look something like this:
5. Dashboard
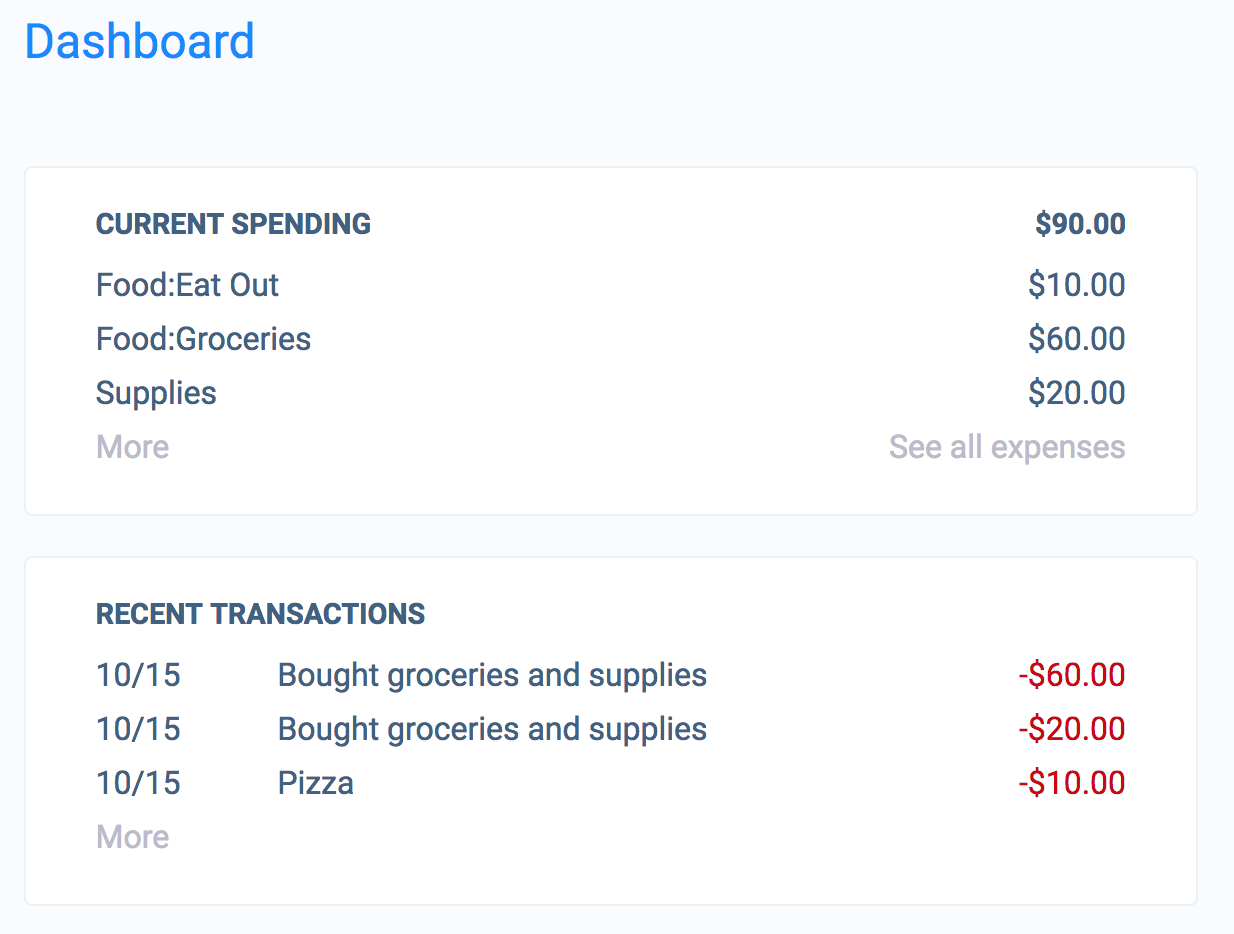
Click on the Dashboard link in your menu. The top section shows your top expense categories by frequency. The bottom section shows your recent transactions. Only transactions that have an income or expense component will show up here. Moving around money between other accounts does not show up here. If you have a split transaction affecting multiple expense or income accounts, each split amount will show up here.
6. Balance Sheet
You can get a snapshot of what your Assets, Liabilities and Equity looks like on any date by going to Reports -> Balance Sheet. Click on Options if you want to choose a different date.
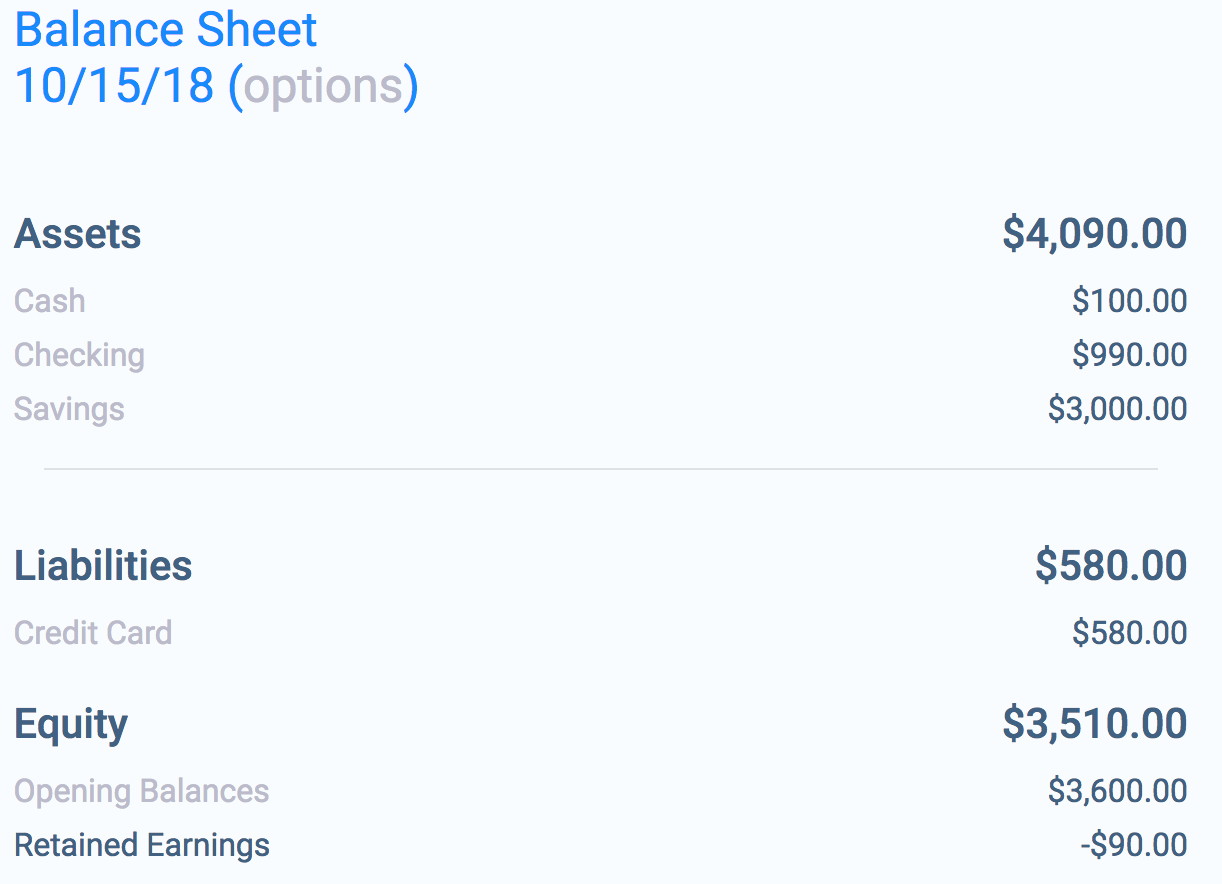
You will notice a Retained Earnings account under Equity that will show you your current Income - Expenses.
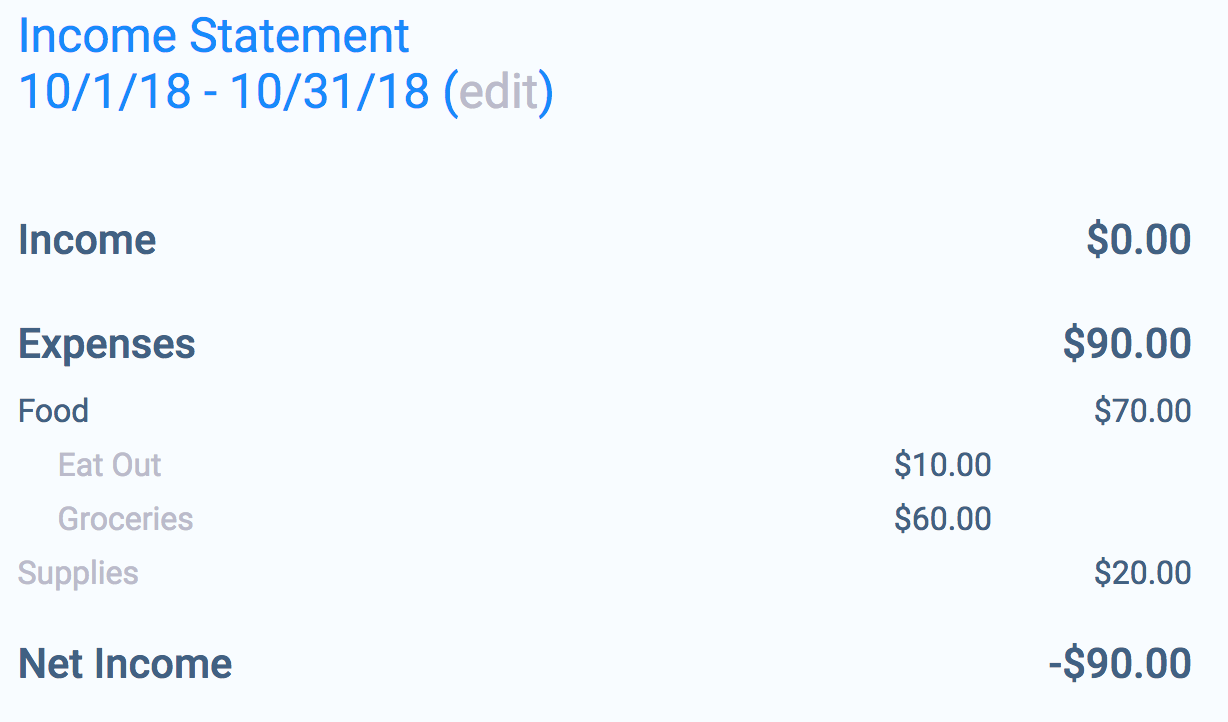
7. Income Statement
You can see your Income and Expenses for any time period by going to Reports -> Income Statment. By default the report shows you data for the current month. Click on Options to choose different dates.